
TL;DR
Moving your rig into another room is the most effective way to cut noise. When that’s not possible, proper placement and ventilation in a closet can still produce great sound, but heat management is key. Focus on distance, barriers, and reflection control first.
Ever feel like your home studio sounds more like a jet engine than a recording space? Noise, heat, and echoes all conspire to make your setup frustrating. But what if the best fix isn’t adding foam or soundproofing—it’s simply moving the rig away from your ears?
In this guide, you’ll learn how placement, acoustic treatment, and clever ventilation can turn a tiny closet into a surprisingly quiet, professional-sounding zone. No fancy construction needed—just smart choices that make a real difference.
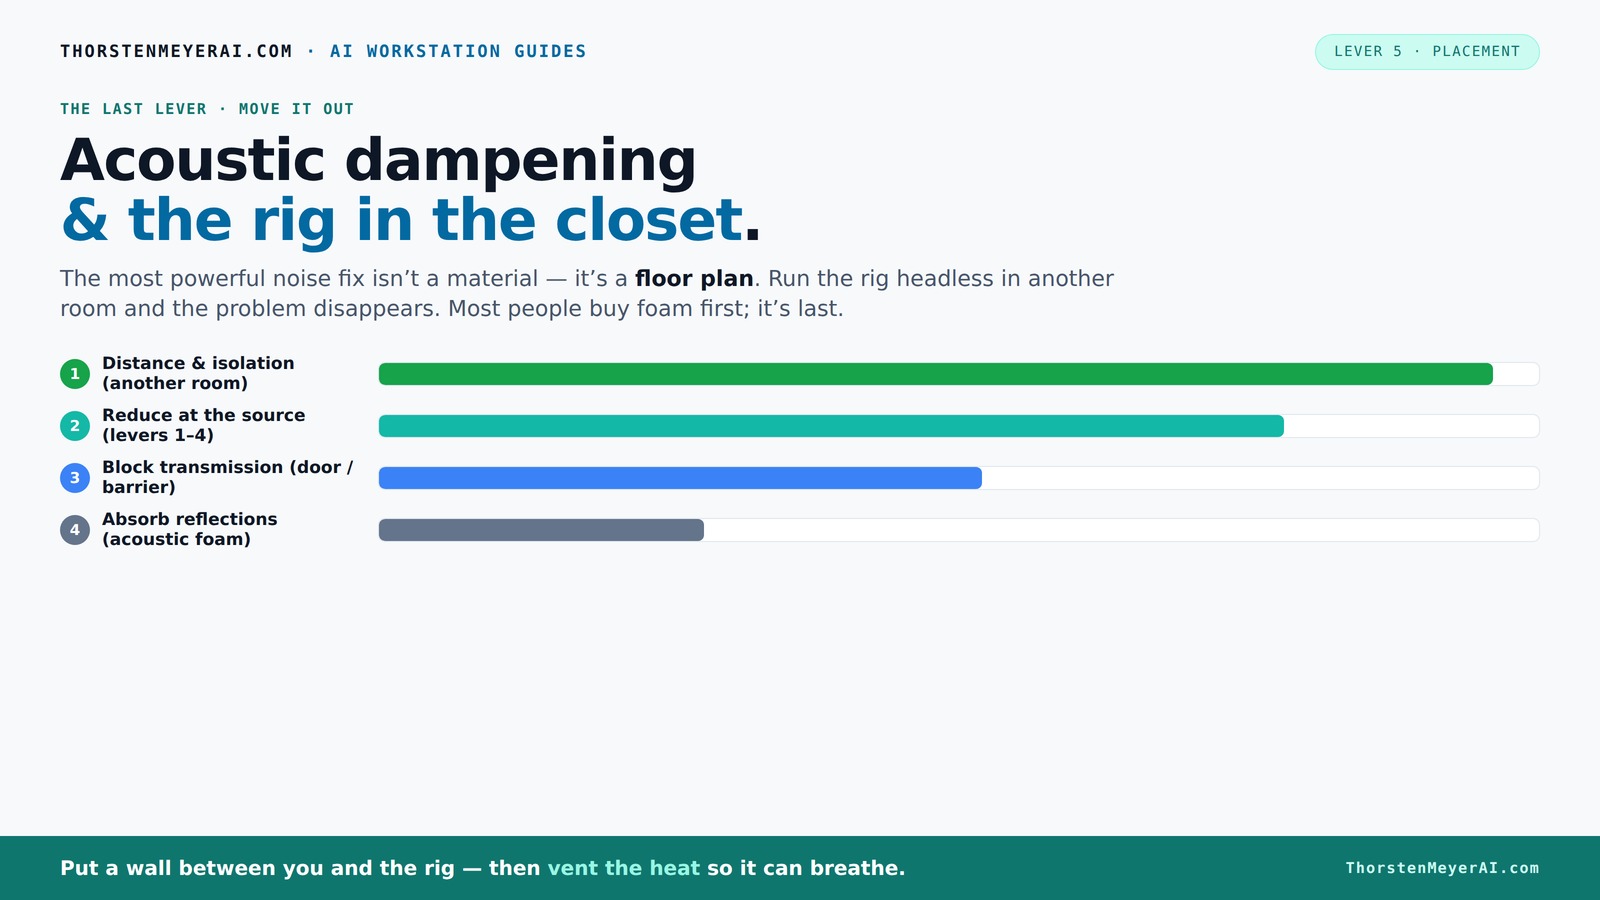
Acoustic dampening
& the rig in the closet.
The most powerful noise fix isn’t a material — it’s a floor plan. A rig you can’t hear because it’s in another room beats any amount of foam. Tap the approaches in Part 1 to see what actually works.
(another room)
(levers 1–4)
(door / barrier)
(acoustic foam)
Contain the noise, not the heat
Key Takeaways
- Moving your rig into another room is the most effective noise reduction—distance is king.
- Proper ventilation is critical in closet setups; trapping heat kills your performance and increases noise.
- Place acoustic panels at reflection points—behind the mic, side walls, ceiling, and corners—for best results.
- Partial coverage (~20–40%) of treatment surfaces balances absorption and natural sound.
- Sealing gaps around doors and outlets reduces noise leaks more than adding foam alone.
AmazingSpark 1 Pcs 48" X 6' Soundproof Room Divider Panel, Foldable Acoustic Partition Wall with Stand and Straps, Freestanding Privacy Screen for Office Study Bedroom Studio Library (Grey)

Foldable acoustic room divider with soundproofing and privacy, ideal for home, office, and studio use.
As an affiliate, we earn on qualifying purchases.
As an affiliate, we earn on qualifying purchases.
Why Distance Beats Everything Else for Noise Control
Distance is the simplest, most effective way to cut noise. If your rig lives in another room, it’s almost silent from your desk. When you’re working remotely—via SSH or API—your physical proximity doesn’t matter. You could have a roaring, 600W GPU in a closet, and you’d never hear it.
For example, I set my AI rig in a basement room, connected over a wired Ethernet. I no longer worry about fans or heat. The only thing I hear is the distant hum of the house, not the GPU’s roar.
So, if noise is a big concern, ask yourself: can I put the machine somewhere else? The answer is often yes, and that’s the biggest win.
This principle matters because it tackles noise at the source, rather than trying to contain or absorb it later. The tradeoff is that relocating equipment might not always be feasible, especially if space is limited. But when possible, it’s the most straightforward solution with the highest payoff. It also minimizes the need for complex treatments, which can sometimes alter the sound or introduce latency. Essentially, prioritizing distance can save time and money while achieving cleaner sound.
The 'Rig in the Closet' Trick—Smart Ventilation Is Non-Negotiable
Putting a high-power rig in a closet sounds perfect—quiet, hidden, out of sight. But a sealed space traps heat. Learn more about acoustic dampening and proper setup. A GPU pulling 600W in a tiny closet will heat up the room fast, causing thermal throttling and loud fans.
To make it work, you need ventilation. Think passive vents or, better, a quiet exhaust fan that pulls hot air out and cool air in. See tips on ventilation and setup. Without airflow, your rig’s temperature will spike, and noise will escalate as fans spin faster to cool things down.
For example, I installed a small duct and a 120mm quiet fan in my closet setup. It keeps the temperature stable, and the noise level drops dramatically—no more heat-induced fan noise.
Check out this article for detailed ventilation strategies.
Understanding why ventilation is critical helps prevent equipment overheating, which not only increases noise but can also shorten hardware lifespan. The tradeoff here is between the effort and cost of installing proper airflow and the risk of thermal issues. Without adequate ventilation, the heat buildup can cause your fans to run at maximum speed constantly, negating any noise reduction gains and risking damage.
Placement Secrets: Where to Put Absorbers for Maximum Effect
Strategic placement of acoustic materials makes all the difference. The first rule: treat the early reflection points. Use the mirror trick—stand where your mic or speaker is, then place panels where you see them in the mirror.
In a closet, focus on these spots:
- Behind the microphone: Absorb or diffuse the wall behind you to tame the biggest reflection.
- Side walls: Find the reflection points with the mirror trick, then treat those spots to stop echo bouncing around.
- Ceiling: A panel above your head reduces vertical reflections that make vocals sound boxy.
- Corners: Bass traps here help control low-frequency buildup common in small spaces.
Proper placement is crucial because untreated reflection points can cause comb-filtering and muddiness, making recordings sound less clear and more distant. Find out more about acoustic treatment placement. By targeting these specific points, you minimize the chances of standing waves and flutter echoes that degrade sound quality. The tradeoff is that over-treating can dull the room's natural liveliness, so understanding where to treat for maximum benefit is key. This approach ensures a balanced sound that is both controlled and natural, which is vital for professional-quality recordings.
How Much Treatment Is Enough? The 20-40% Rule
Many assume covering every inch of the wall is best. Not true. Recent advice suggests that about 20–40% coverage of reflective surfaces yields significant improvements without overdoing it. Learn more about acoustic treatment strategies.
For example, covering the wall behind the mic and the side reflection points with foam or panels often hits that sweet spot. Too much coverage can make the space sound dull or dead, especially in small closets.
In my setup, I used about 25% coverage—just enough to tame echo without losing liveliness. This approach balances absorption with natural room ambiance.
Understanding this tradeoff is important because over-treatment can result in a sterile, unnatural sound that lacks character. Conversely, under-treatment leaves reflections that muddy recordings. Striking the right balance ensures clarity while maintaining a sense of space, which is essential for realistic and engaging audio. This partial coverage approach is a practical compromise that keeps your space sounding professional without sacrificing its natural acoustics.
Bass Traps and Low-End Control in Small Closets
Small, parallel-walled closets tend to boost bass frequencies, creating a muddy, boomy sound. Discover how to control low-end in small spaces. Bass traps placed in corners can help tame this low-end buildup.
For example, I added thick foam bass traps in each corner, which reduced the boominess and made vocals sound tighter. These are especially useful if your recordings sound 'boxy' or 'muddy.'
According to recent guidance, bass trapping is most effective when low frequencies dominate—something common in tiny, sealed spaces. Check your room with a simple tone test; if bass sounds uneven, add traps. The key is to target the specific problem frequencies—using a spectrum analyzer or tone generator can help identify where to focus your trapping efforts for maximum effect. Over-trapping low frequencies can result in a thin, unnatural sound, so focus on the problem areas and use the right density and placement to achieve a balanced low end.
Seal Gaps, Doors, and Leaks—Stop Sound Leakages First
Soundproofing isn’t just about absorbing sound—it's about blocking it from escaping. Gaps around doors, outlets, and vents are weak spots that let noise leak out.
Simple fixes: a heavy draft stopper under the door, sealing outlet gaps with foam or putty, and adding weatherstripping around the door frame. These small steps can cut noise transmission by 10–20 dB.
Sealing gaps is especially important because even tiny openings can significantly reduce the effectiveness of your soundproofing efforts. If sound leaks out, it can also bring in external noise, defeating the purpose of your treatment. The tradeoff involves some effort and minor expense, but the payoff is a much quieter environment. Proper sealing creates a more controlled acoustic environment, allowing your treatments and equipment to perform at their best. Remember, the goal is to create a barrier, not just absorb sound inside the space.
Can a Closet Be a Quiet Recording Space? Yes, with Conditions
In a small closet, quietness depends on treatment, sealing, and placement. When done right, it can produce clear vocals and clean recordings. But it’s a compromise—expect some room tone and boxiness.
Use thick blankets, acoustic panels, and door sealing. Add a reflection filter if needed. With proper ventilation and treatment, your closet can serve as a decent vocal booth for podcasts, voice-overs, or rough mixes.
For instance, I recorded a podcast episode in my closet by lining the walls with blankets, sealing the door, and placing foam panels behind the mic. The sound was surprisingly professional.
Keep in mind that small spaces naturally emphasize certain frequencies and may introduce coloration. The tradeoff is convenience versus perfect acoustics; a closet can be a quick fix but might not replace a dedicated studio. Properly treated, sealed, and ventilated, it becomes a functional space that balances practicality with quality—ideal for casual or semi-professional work.
Frequently Asked Questions
What’s the biggest difference between dampening and soundproofing?
Dampening reduces reflections and echoes inside a space, making it sound better. Soundproofing blocks sound from passing through walls or barriers, preventing noise from leaking in or out.Where should I place acoustic panels in a closet studio?
Focus on the reflection points: behind the mic, side walls where sound bounces, the ceiling above your head, and corners for bass trapping. Use the mirror trick to find reflection spots.Do I need bass traps in a tiny closet?
Yes, if you notice boomy, muddy lows or uneven bass response. Bass traps placed in corners help control low-frequency buildup typical in small, sealed spaces.How much wall coverage do I need for effective treatment?
About 20–40% coverage of reflective surfaces is usually enough to tame echo and improve sound without deadening the room. Focus on key reflection points first.Can I make a closet studio quiet enough without permanent changes?
Absolutely. Sealing gaps, using blankets, acoustic panels, and proper ventilation can turn a closet into a decent recording space without major construction.Conclusion
Sometimes, the simplest step—just moving your rig—can save you a world of noise and heat headaches. But if space constraints keep you close, smart placement, ventilation, and targeted treatment make a tiny closet surprisingly usable. Think of it as turning a noisy closet into your secret weapon for clear, focused recordings.
Remember: good sound isn’t about perfect walls—it’s about where you put your attention. Start with distance, then treat reflection points, and always keep heat in check. That’s how you turn chaos into clarity.